In a nutshell
- 💨 Switch from stirring to flow: turn a fan into an exhaust and create cross-ventilation by cracking an opposite window/vent to eject moist air and pull in drier replacement air.
- 🧪 Physics made simple: maximise the vapour pressure deficit (VPD) by removing humidity; pair gentle warmth with exhaust, and place a dehumidifier at the inlet when outdoor air is muggy.
- 🏠 Practical UK setup: a box fan facing out of a window, open trickle vents or a door gap as make-up air, use bathroom/kitchen extractors, keep airflow paths clear, and avoid strong negative pressure near open‑flued gas appliances.
- ⚖️ Pros vs. Cons: fan‑out is cheap and fast but weather‑dependent; fan‑in improves surface airflow yet traps humidity; dehumidifiers give control but cost energy—combine exhaust + inlet drying for best results.
- 📈 Tangible gains: noticeably faster drying after mopping or carpet cleaning, fewer odours and mould risks, and smarter energy use by prioritising humidity removal over blasting heat.
You mop, steam, or shampoo, then wait… and wait. Yet there’s a surprisingly simple tweak that turns that dreary, post-cleaning pause into a brisk turnaround: change how the air moves. Instead of merely stirring the same moist air around, create a one-way route that ejects humidity and draws in drier replacement air. In practice, that means turning a fan into an exhaust, not a blaster; pairing it with a small crack in a window or trickle vent on the opposite side; and letting physics do the heavy lifting. Below, I unpack the science, a pragmatic UK setup, and the trade-offs, with field notes from homes and sites where that single shift made floors and fabrics dry markedly faster.
The One Shift: From Stirring Air to Creating Flow
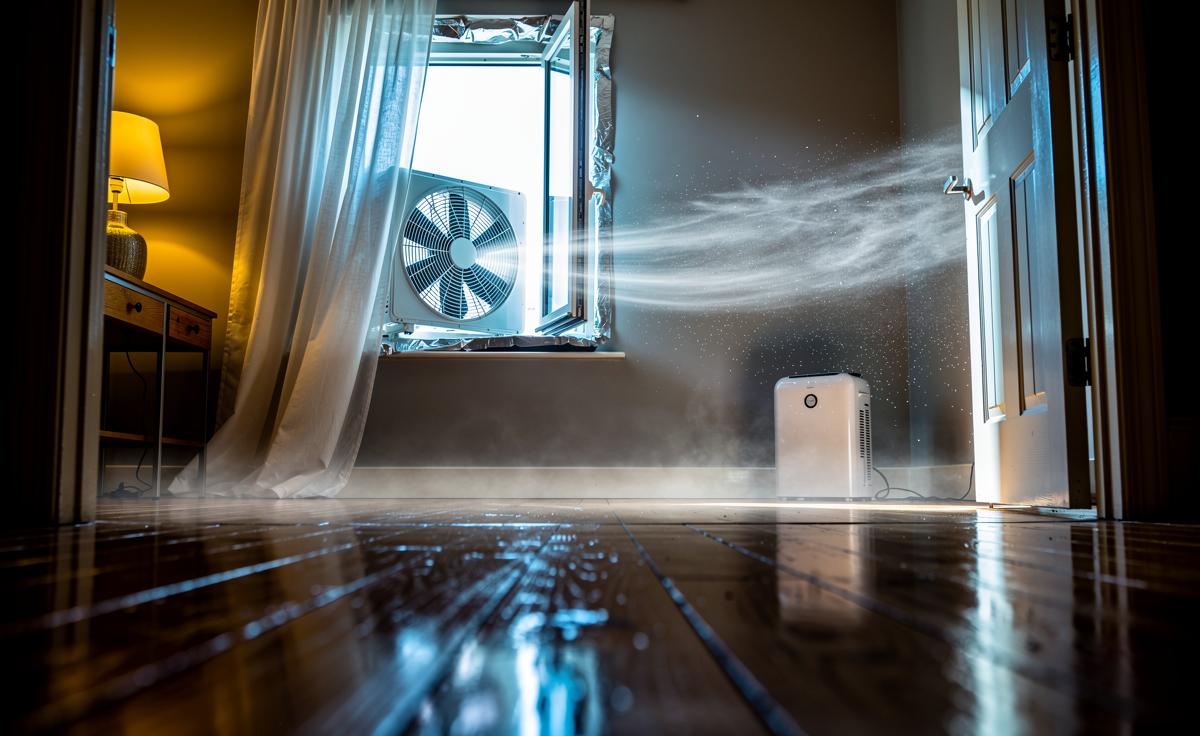
The common instinct after cleaning is to point a fan at the damp patch and crank it up. That feels right—but it often just recirculates moist air like a tumble dryer with no vent. The faster fix is to move moisture out. Position a box fan or axial fan in a window, facing outward, so it works as an exhaust. Then provide a “make-up” air path—open a door gap, crack a window across the room, or open a trickle vent. This creates cross-ventilation, pulling drier air from elsewhere and pushing wet air outdoors. The result is a steady drop in indoor humidity around the drying surfaces, which is precisely what evaporation wants.
In testing across UK homes and on cleaning jobs, that single change—fan out, not in—reliably outperforms oscillating fans that simply swirl humidity. Think of it as setting a directional conveyor belt for water vapour. Exhaust the wet, invite the dry. If you own a dehumidifier, place it on the inlet side (near the cracked window or door) to dry incoming air further, while the fan continues to eject the room’s moisture-laden air. It’s a simple choreography: exhaust at one end, conditioned supply at the other, and a clear path in between.
- Place fan in a window, blowing out.
- Open make-up air on the opposite side (door gap, vent, or small window crack).
- Keep path clear: no heavy curtains or furniture blocking the flow.
The Physics, Simplified: Why Exhaust Beats Recirculation
Drying hinges on the vapour pressure deficit (VPD)—the gap between how much moisture the air can hold and how much it already holds. When a room gets humid after cleaning, that gap shrinks and evaporation slows. Recirculating fans can reduce the “boundary layer” of saturated air right at the surface, but they don’t address the bigger issue: the whole room is getting wetter. By contrast, exhaust-led airflow lowers room humidity by physically removing water vapour. That restores a healthy VPD, so moisture keeps leaving surfaces. It’s the difference between shifting steam out of a bathroom versus just swirling it around the mirror.
What about heat? Warmer air can hold more moisture, so modest warmth helps—but blasting heat alone often backfires, especially in sealed rooms. You end up with hot, humid air that still dries slowly. The shortcut is warm air plus active removal of moisture. If the outdoor air is cold and relatively dry (common on clear winter days), the effect is pronounced: incoming cool air warms indoors, lowering relative humidity even further. Conversely, on soggy summer afternoons, you may need a dehumidifier in the make-up air stream to keep the VPD favourable.
- Why “more fan” isn’t better: speed without an exit keeps humidity trapped.
- Why “more heat” isn’t better: hot air that’s humid still dries slowly.
- Best blend: gentle heat + exhaust + controlled make-up air.
A Practical UK Home Setup: Windows, Extractors, and Trickle Vents
Most UK homes already have the kit to do this well. In a typical terraced or flat scenario, use a box fan or portable extractor turned outward in the room you’ve just cleaned. Open a trickle vent or crack a window in an adjacent room or hallway to feed drier air. If available, switch on a nearby bathroom or kitchen extractor fan as an extra assist, provided it vents outdoors. Keep internal doors ajar to create a clear, short airflow path across the damp zone. If odour transfer is a worry, use door stops to angle the route away from bedrooms and wardrobes.
Be mindful of safety. Do not create strong negative pressure near open-flued gas appliances or fireplaces; close those rooms off or keep extraction modest. In rental flats with limited window openings, a slim fan can sit in the reveal, sealed with a towel to prevent blowback. Where noise curfews apply, run the setup on a lower speed for longer; consistency matters more than roar. If mould is an ongoing concern, consider adding a small desiccant dehumidifier near the make-up air to knock humidity down further as it enters.
| Airflow Action | Primary Effect | Quick Tip |
|---|---|---|
| Fan in window, blowing out | Expels moist air | Seal gaps around fan to avoid recirculation |
| Cracked window/vent opposite | Supplies drier air | Open smallest gap needed to maintain flow |
| Extractor fan (bath/kitchen) | Boosts removal | Confirm it vents outdoors, not to loft |
| Dehumidifier at inlet side | Dries incoming air | Use continuous drain mode if possible |
Pros and Cons: Fan-Out, Fan-In, and Dehumidifiers
Every method has a niche. The fan-out strategy is cheap, fast to deploy, and brilliant when outdoor air is cooler and relatively dry. It also scales: add an extractor or cracked transom to intensify the draw. Its downside appears on muggy days or near busy roads where you’d prefer not to invite outdoor air. A fan-in approach (blowing across the floor) can speed boundary-layer turnover, but it stalls if the room’s humidity climbs—and it often does without an exit route.
Dehumidifiers offer control regardless of weather. Placed smartly at the make-up side, they dry incoming air while the fan expels moist air at the other end—an excellent combo in coastal or summer conditions. The trade-off is energy cost and noise. The rule of thumb: if the room feels steamy, prioritise exhaust; if outdoors is muggy, add dehumidification. On large jobs—carpets after hot-water extraction, for instance—pros often pair low-speed warmth with directed exhaust and a dehumidifier near the inlet for the quickest, most consistent results.
| Method | Pros | Cons | Best For |
|---|---|---|---|
| Fan-Out (Exhaust) | Low cost; rapid humidity removal; simple | Less effective in humid weather; potential noise | Cool/dry days; post-mopping; steam cleaning |
| Fan-In (Recirculation) | Reduces boundary layer; easy to aim | Can trap humidity; plateaus quickly | Spot-drying with good ventilation already present |
| Dehumidifier | Weather-agnostic; precise control | Energy cost; slower alone than exhaust+inlet | Humid days; coastal homes; sealed flats |
In the end, the fastest drying after cleaning isn’t about brute force; it’s about direction. Point one fan out, give air a way in, and let humidity leave. Add gentle warmth and, if needed, a dehumidifier at the inlet to polish the effect. This is a small, almost counterintuitive shift—from blowing at the wet spot to escorting moisture out of the room—that pays back in minutes saved and odours avoided. How might you re-stage your fans, vents, and doors on your next clean to test how quickly your own rooms snap back to dry?
Did you like it?4.6/5 (21)